You’d be amazed at what your wooden fence actually looks like under all that dirt. The natural grain is still there, just hidden beneath mildew, tough stains, and years of Oklahoma weather. If you’re wondering how to clean a wood fence without damaging it, we’re going to show you exactly what works. At Tiller, we’ve seen plenty of fences that looked beyond saving, and we’ll walk you through a simple process that’ll remove mold, get rid of that grime, and make your yard feel fresh again.
Cleaning a Wood Fence: Step by Step
Giving your wooden fence a proper clean isn’t hard, but it does take a little planning and patience. Here’s how to do it the right way from the very beginning.
Step 1: Inspect the Entire Fence
Start by walking the length of your entire fence. Look closely at each section and keep an eye out for loose boards, popped nails, warping, or any mold and mildew buildup. Pay extra attention to the bottom of each panel, where moisture tends to collect. If you’ve got green algae, water stains, or soft wood, make a note of those areas. You’ll want to treat them more carefully. Checking everything now also helps you catch any repairs before you start pressure washing or spraying bleach around.
Step 2: Gather Tools: Garden Hose, Pressure Washer, and Cleaning Solution
Next, collect your gear. At a minimum, you’ll need:
- A garden hose with a nozzle that gives you decent pressure
- A scrub brush (a long-handled one helps save your back)
- A spray bottle or garden sprayer
- A bucket for mixing
- A cleaning solution
There are a few options for cleaning solutions. You can use a mild detergent with warm water, a vinegar solution for lighter stains, or something stronger like Simple Green or oxygen bleach. If you’re tackling mold and mildew, household bleach or chlorine bleach works. Just dilute it properly (usually 1 part bleach to 3 parts water). And of course, always wear gloves and eye protection, and cover nearby plants with plastic sheeting if you’re using harsher products.
Step 3: Pre-Rinse to Begin to Clean a Wood Fence
Before applying any cleaner, give your fence a good pre-rinse using the garden hose. Spray the surface top to bottom. This helps remove loose dirt and grime and gets the wood wet, which prevents the cleaning solution from soaking in too fast and drying unevenly. If you’re dealing with a particularly dirty spot, get in there with a scrub brush and loosen up that layer first.
Step 4: Apply Cleaner to Clean a Wood Surface and Let It Sit
Now it’s time to apply your cleaner. Use a spray bottle or garden sprayer to coat a section of the fence. Make sure to saturate stained areas, corners, and spots where dirt builds up. Once it’s covered, let it sit for 10 to 15 minutes. This gives the solution time to break down grime and algae. Remember to keep an eye on it and don’t let it dry completely. If needed, mist it again with water to keep it wet.
Step 5: Remove Green Algae, Mold, and Mildew
For areas with green algae or mold and mildew, use a scrub brush. A stiff bristle brush works well to scrub the surface without damaging the wood grain. If the buildup is bad, apply a second round of cleaner or spot treat with a baking soda or vinegar solution. If you use bleach, make sure you rinse thoroughly. You don’t want to leave any residue that could harm your plants or stain the wood later.
Step 6: Decide Whether to Power Wash or Use a Garden Hose
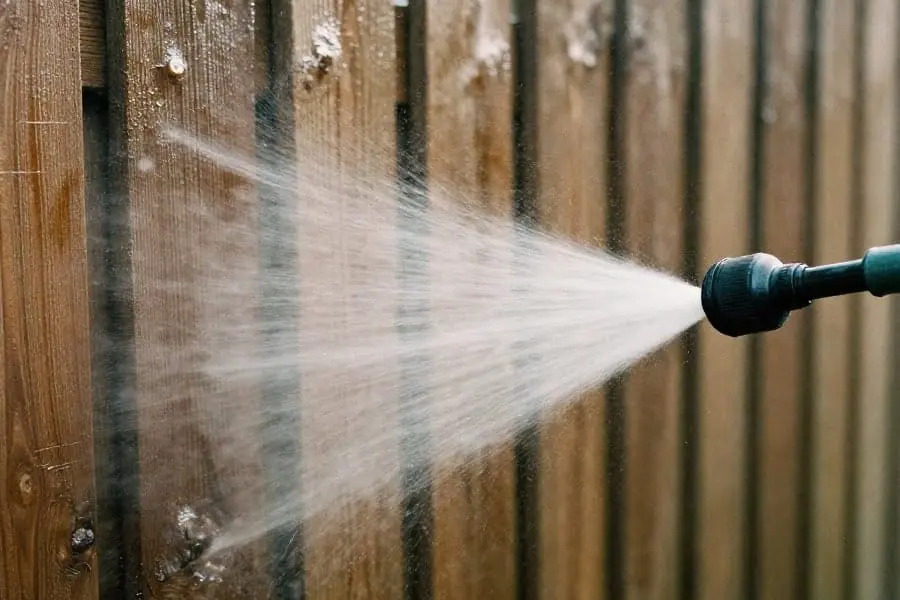
Here’s where you decide whether you use a pressure washer or just use a garden hose. If your fence is newer and in good shape, pressure washing is fast and effective. Just make sure you’re using a low setting (500 to 1200 PSI) and a wide-angle nozzle to avoid damaging the wood. Hold the wand about 18 inches away and keep it moving with the grain.
Don’t power wash old or brittle boards because the high pressure can chew up the wood quickly. In those cases, stick with the hose and scrub brush.
Step 7: Rinse Thoroughly to Clean Your Fence
Once you’ve scrubbed and treated everything, it’s time to rinse. Use your garden hose or pressure washer on a gentle spray and go over every inch. Work from top to bottom and make sure the cleaning solution and grime are fully rinsed off. This helps protect your plants and gives you a clean wood fence that’s ready to dry out and seal later. This would also be a good time to add any stain or wood brightener if you’re going for a new look for your fence.
Step 8: Final Inspection to Ensure a Clean Wood Fence
After everything is rinsed and has had time to dry, do one more walkaround. Check for stubborn stains, spots you might’ve missed, or areas where dirt is still clinging. If you see anything, give it a spot treatment and rinse again. You want to make sure everything looks even and clean before you move on to sealing or painting.
How to Address Stubborn Stains On Your Wood Fence
Some stains don’t budge easily. Rust from hardware, dark water streaks, or old algae spots may need extra help. Try a direct spray of vinegar or a paste made with baking soda and water. Let it sit for 15 minutes, then scrub with your brush. If that still doesn’t work, apply wood cleaner or oxygen bleach to the area and rinse. Repeat as needed, but don’t overdo it because too much scrubbing can wear down soft wood.
What NOT to Do When Cleaning a Wood Fence
There are a few common mistakes that can cause more harm than good. Make sure to avoid the following:
1. Don’t Use Too Much Pressure
A pressure washer can be great, but if you crank it up too high or use the wrong nozzle, you can shred the wood surface. Always use a wide nozzle and a low setting. Keep it moving and don’t get too close. If the boards start to splinter, stop immediately.
2. Don’t Skip Protective Steps
If you’re using chlorine bleach, spray bleach, or any strong solution, wear gloves and goggles. Bleach can burn skin and eyes. Always rinse well and cover nearby plants with plastic sheeting so they don’t get hit with runoff.
3. Don’t Clean in Harsh Sunlight
If you clean your fence on a hot, sunny day, the solution can dry too fast and leave streaks. Choose a cooler day or work in sections, keeping the surface wet as you go.
4. Don’t Mix Cleaners Carelessly
Stick to one type of cleaner at a time. Mixing bleach and vinegar (or other chemicals) can create toxic fumes. If you try a new solution, rinse off the previous one first.
Regular Maintenance Tips to Keep Your Wooden Fence Looking Fresh

A full deep clean once a year is great, but regular maintenance goes a long way in between. Some tips you should keep in mind include:
- Rinse with a hose every few months to remove dirt and grime buildup
- Trim back nearby plants to improve airflow and reduce moisture
- Spot clean any stained areas as soon as you notice them
- Apply a fresh coat of stain or sealant every couple of years to protect the wood
- Keep the base of the fence clear of leaves, mulch, and debris to avoid rot
- Inspect after storms for damage, dirt, or mud splashes
- Use a spray bottle with vinegar or mild detergent to touch up mold or algae patches
When Cleaning Isn’t Enough, Transform Your Yard With a New Fence
Even with regular cleaning, fences don’t last forever. If the wood is warped, cracked, or falling apart, sometimes it’s better to start fresh. Tiller Fence and Deck offers expert wood fence installation, helping homeowners all over the Oklahoma City area build beautiful new fences that last. Whether you’re ready to replace an old fence or want to upgrade your yard’s curb appeal, we can help you pick the right materials and design for your space.
So if your current fence has seen better days, give us a call at (405) 784-4424, and we’ll fill you in on everything you need to know to get started!